 I'm a tech professional (ex-Amazon) with experience including software engineering, and management. Currently living in NYC.
 DIY Copper and Wood Monitor Stand
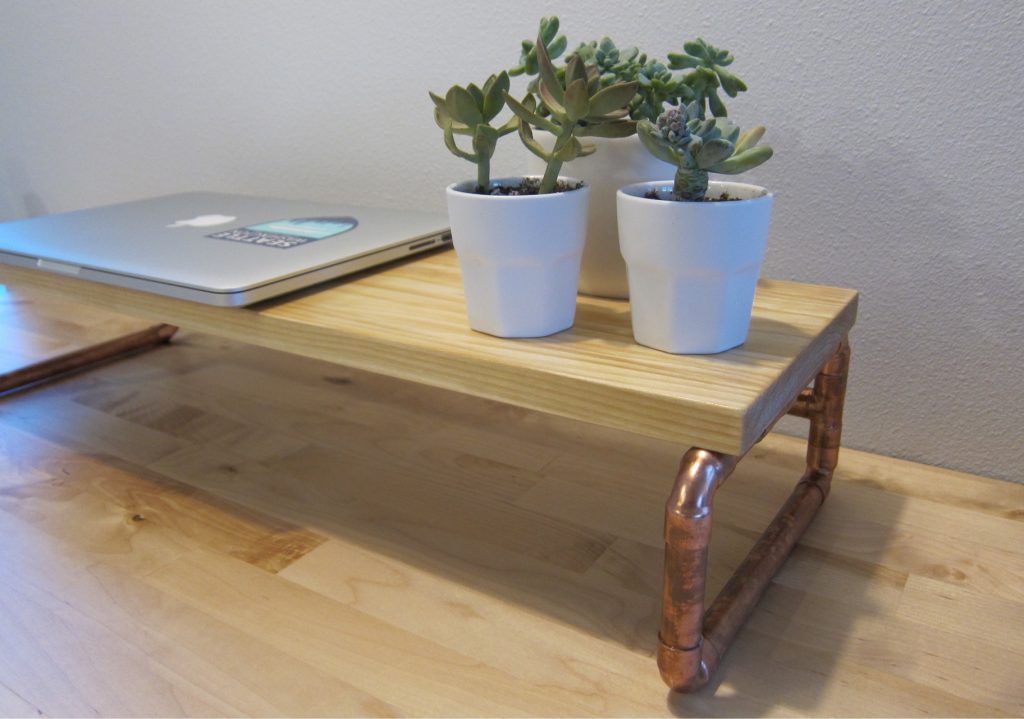
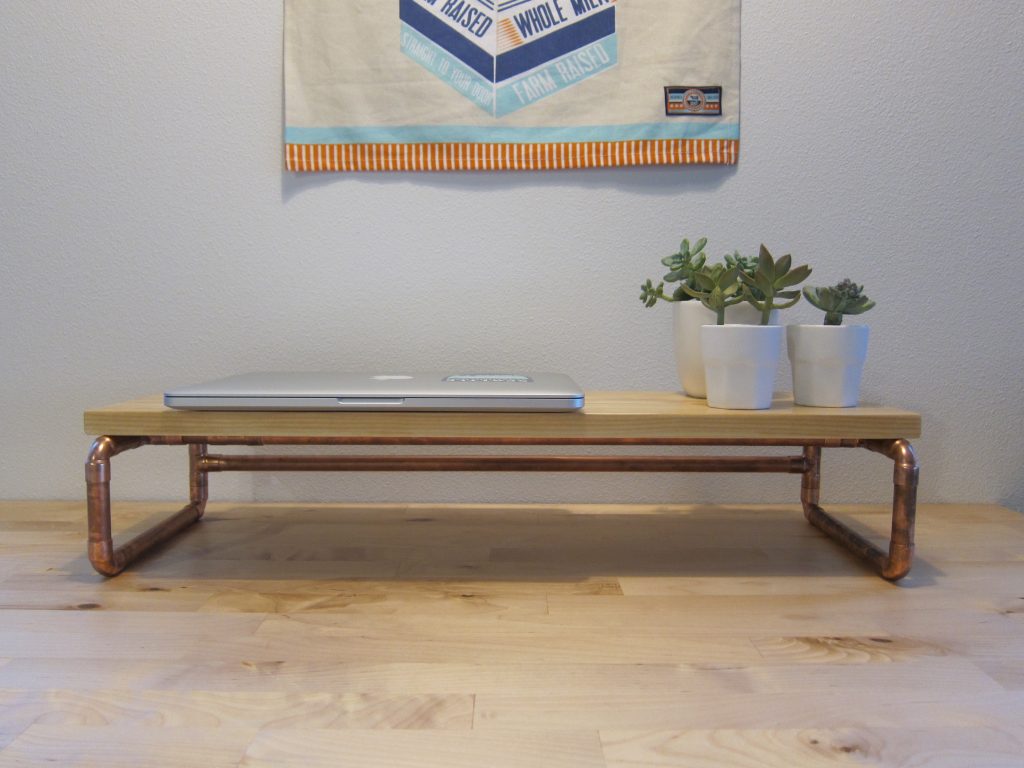
I was in need of a way to lift my computer monitor off my desk in order to create space for my keyboard to slide underneath, so I designed and built this stand out of copper pipe. It gives me much more desk space when I need it and looks nice too.
Materials
Your local hardware store probably has all the materials necessary to build this project and without the need to buy the copper fittings in bulk, so I’d go there first; however, I’ve also included links to online sources if you’d prefer to purchase through the internet.
- 0 feet 1/2″ Copper Pipe
- [8] 1/2″ Copper Elbows
- [4] 1/2″ Copper Tee
- [2] 1/2″ Copper Tie-downs
- Tube cutter
- Wood screws
- Wood project board (though any kind of wood will be fine)
- Tung oil (or other wood finish)
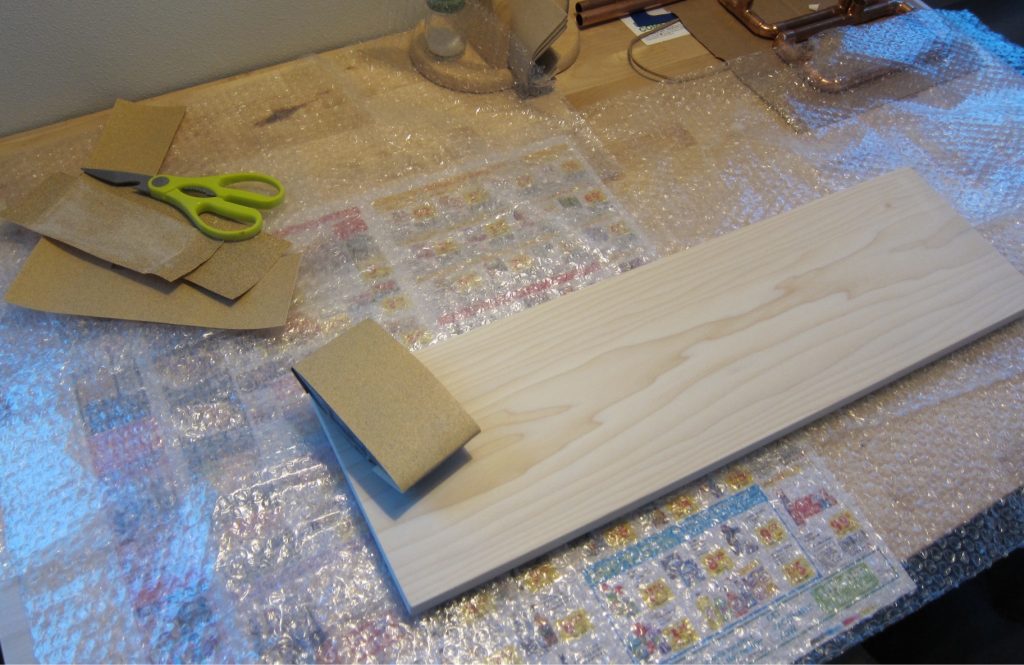
- Sandpaper (100, 150 and 200 grit)
- Emory paper
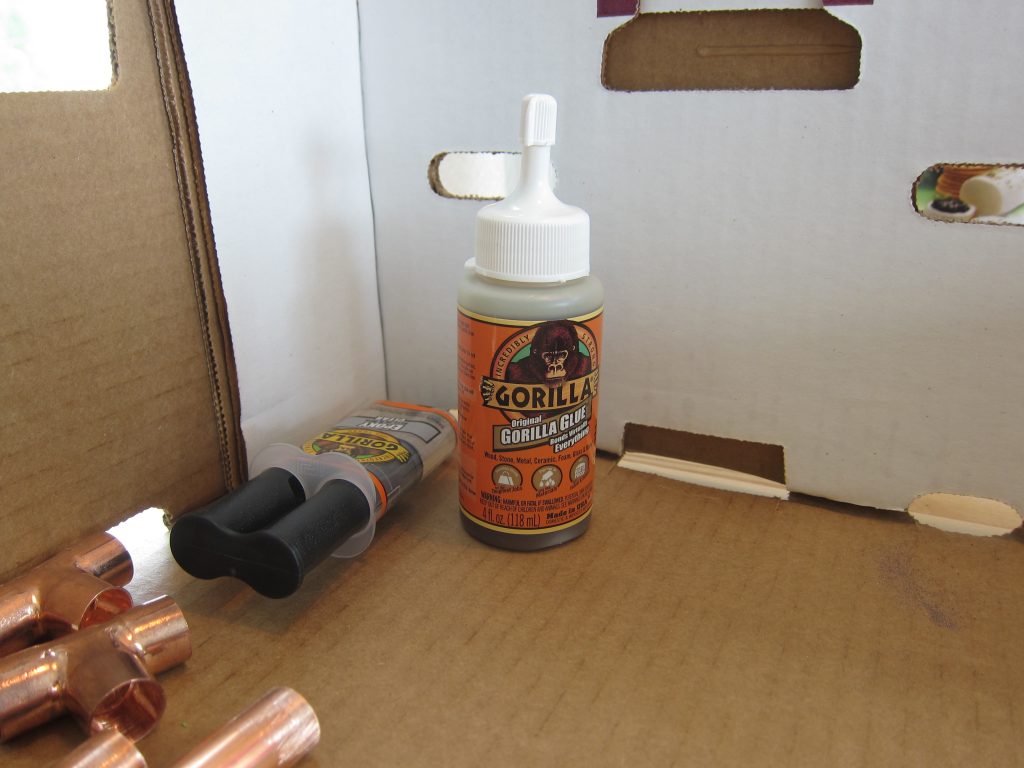
- Gorilla glue or 2-part Epoxy
- (Optional) Sanding block
- (Optional) Spray polyurethane
All up, the raw materials will cost you around $20 – $30 depending on where you get them.
Design
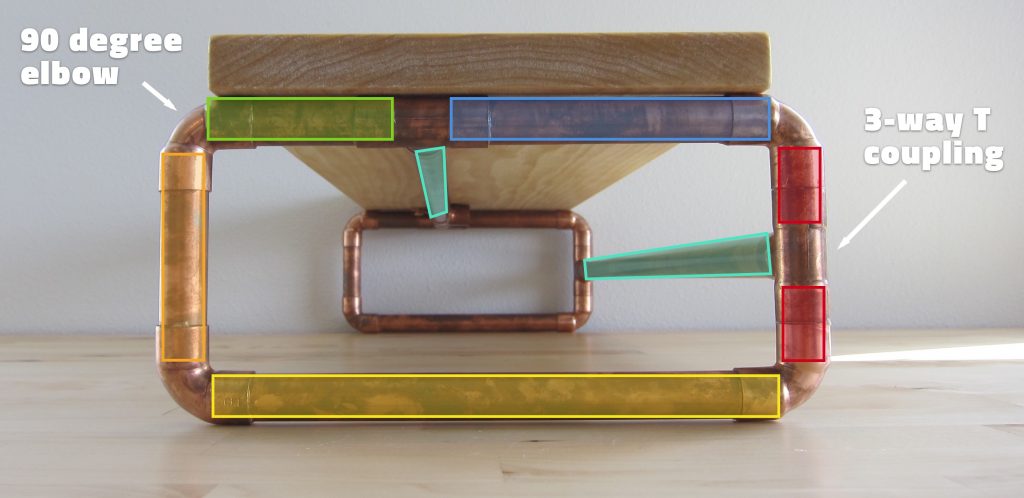
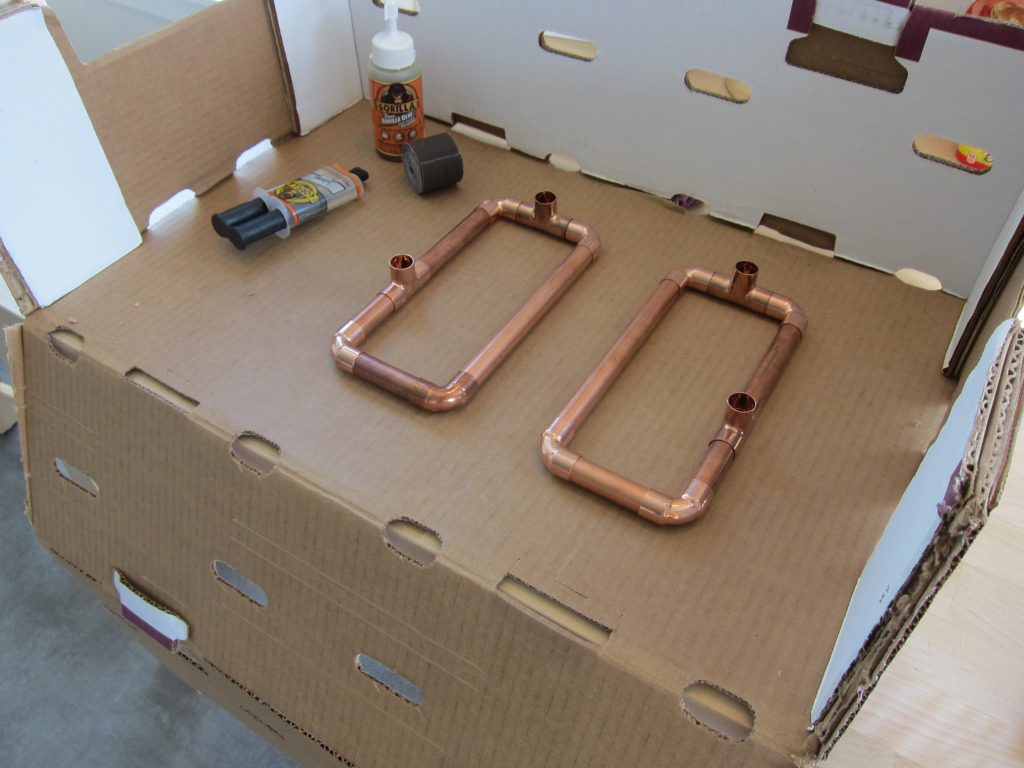
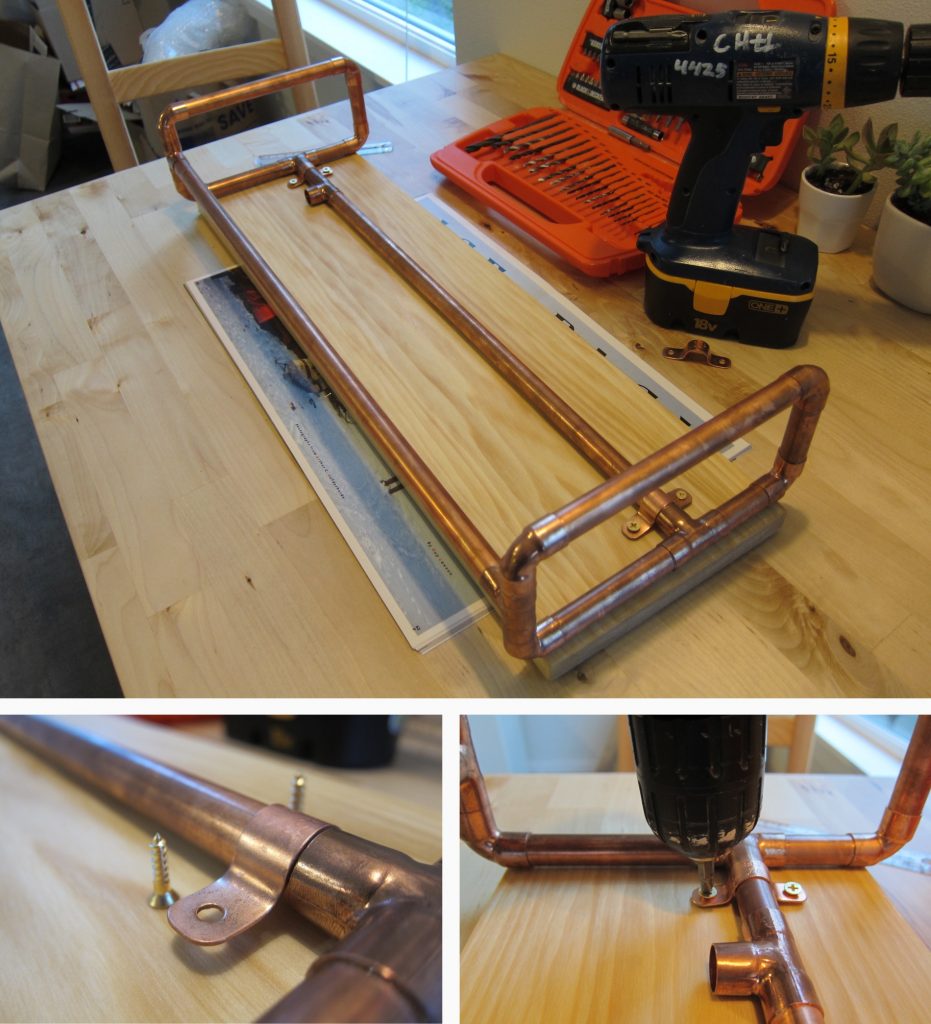
The design of this stand is symmetrical – 2 rectangular end pieces connected by 2 longer pipe sections. The rectangular shape is made by using 4 90 degree copper elbows with 2 Tee couplings along two of the sides to accept the longer connecting pipes.
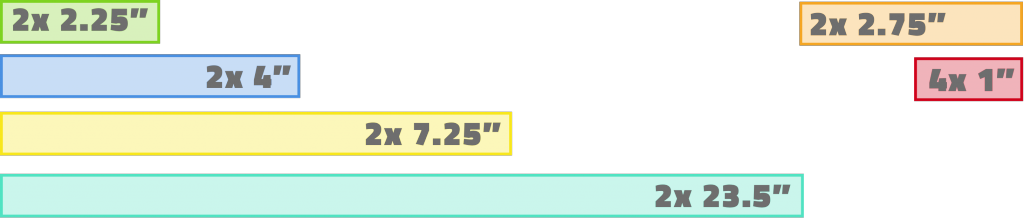
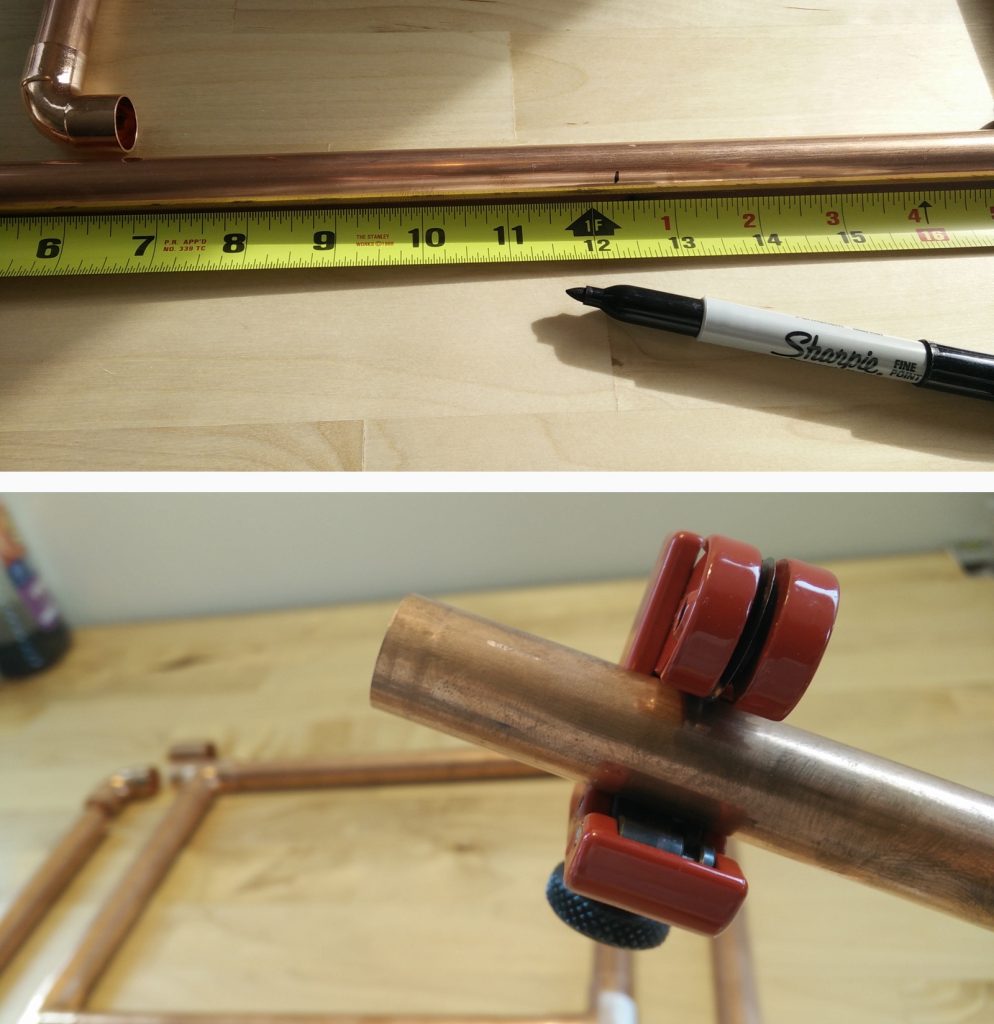
Below you can see the pipe dimensions I used for this project. I settled on a board that was 7.25 inches wide and 25 inches long but you can really go with any dimensions you please, just make sure to adjust the pipe lengths accordingly.
Assembly
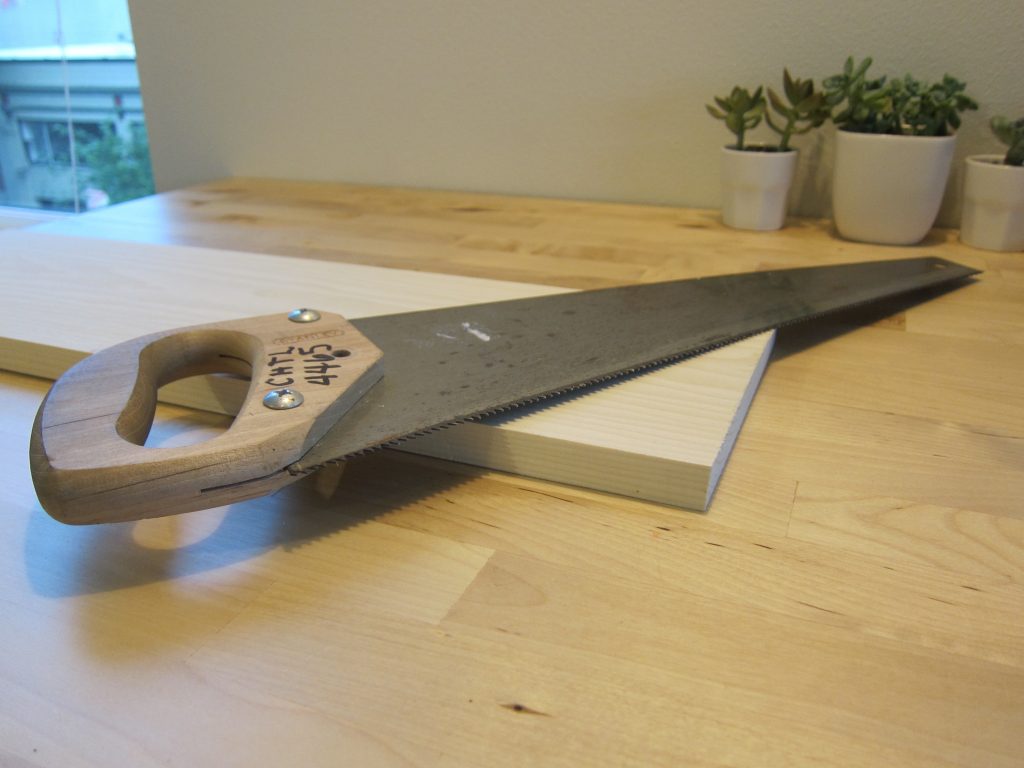
Unfortunately I live in an apartment, so I didn’t have anywhere to use a circular saw or any kind of power saw so it was back to the hand saw for me. The trick when hand sawing a piece of wood is to go slow and get a straight starting groove. Once you’ve cut a couple of millimeters into the wood, that channel will guide the saw and keep it straight allowing you to saw faster.
I cut the wood to 25 inches long because that’s what fit best on my desk, but feel free to change this up (just remember to account for the length of the wood when measuring for the copper base).
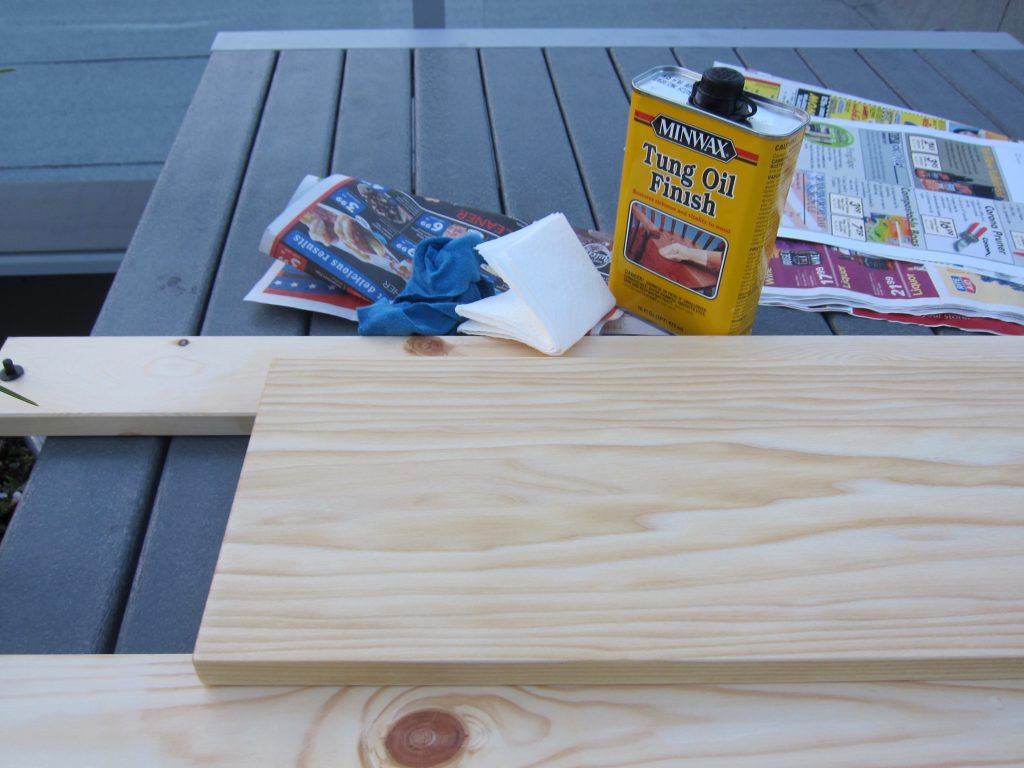
Once the wood is cut, you’ll want to give it a good sanding with progressively finer grit sandpapers. I used 100, 150, then finally 220 grit and sanded until I didn’t feel any rough spots before moving onto the next grit.
Cutting and Gluing the Pipes
Measuring and cutting the pipe was probably the most laborious part of this build. Measure and mark the length you need on the pipe with a marker. To cut, tighten your pipe cutter around the pipe like in the picture, taking care to line the cutting wheel up with the mark you made. Twist the cutter around the pipe a few times then tighten the cutter. Twist a few more times and tighten. By tightening the cutter progressively, you cut a deeper and deeper grove in the pipe until your cut goes all the way through.
Throughout the process of cutting the pipe, I did dry fits of the pieces to make sure I had measured correctly. When it comes to gluing, make sure to give both the end of the pipe, and the inside of the coupling, a rough sanding with emory paper to ensure good adhesion (emory paper is basically coarse sandpaper).

You could use a multitude of glues for this project: solderless copper binding glue, 2-part epoxy, or Gorilla glue. I choose Gorilla glue because it was cheap and held up nicely in a previous project. Solderless copper binding is expensive but would also work well; however, it sets within a few seconds. With Gorilla glue or epoxy you’ll want to wait at least a few hours for the glue to set.
When glueing, apply glue to both the male and female ends of the joint then push the pieces together and wipe off the excess glue. I prepared all the pieces needed for each endcap and glued them all at once so I could lay the whole section flat on the table and ensure the piece was perfectly level as it dried.
Finishing the Wood
After you’ve sanded the wood, you’ll want to consider finishing. I choose to use a penetrating oil to bring out the grain and protect the piece. A penetrating oil stain, like tung oil, will soak into the wood and dry giving the piece a nice subtle sheen and natural look: it acts in a similar way to water in that it will raise the grain of the wood and highlight it’s raw character. I ended up doing 4 coats of tung oil following the instructions in this great youtube video. Feel free to stain the wood any color you’d like and seal it with polyurethane if that’s more the look you’re going for.
Final Assembly
Once the base piece and wooden top piece are complete the assembly is quite easy. Just place the board upside down on the table and align the copper base with the board. The wood I used was 4 inches deep and the base was a bit wider than that so there was overhang – just make sure you’ve got the base evenly lined by lengthwise and widthwise. Grab two of those copper straps and some wood screws, and screw the pipe down to the board like in the picture below.
Done!
Special shout out to the Capitol Hill Tool Library here in Seattle for lending me the saw and drill without which this project wouldn’t have been possible (or at least would’ve been much more difficult).